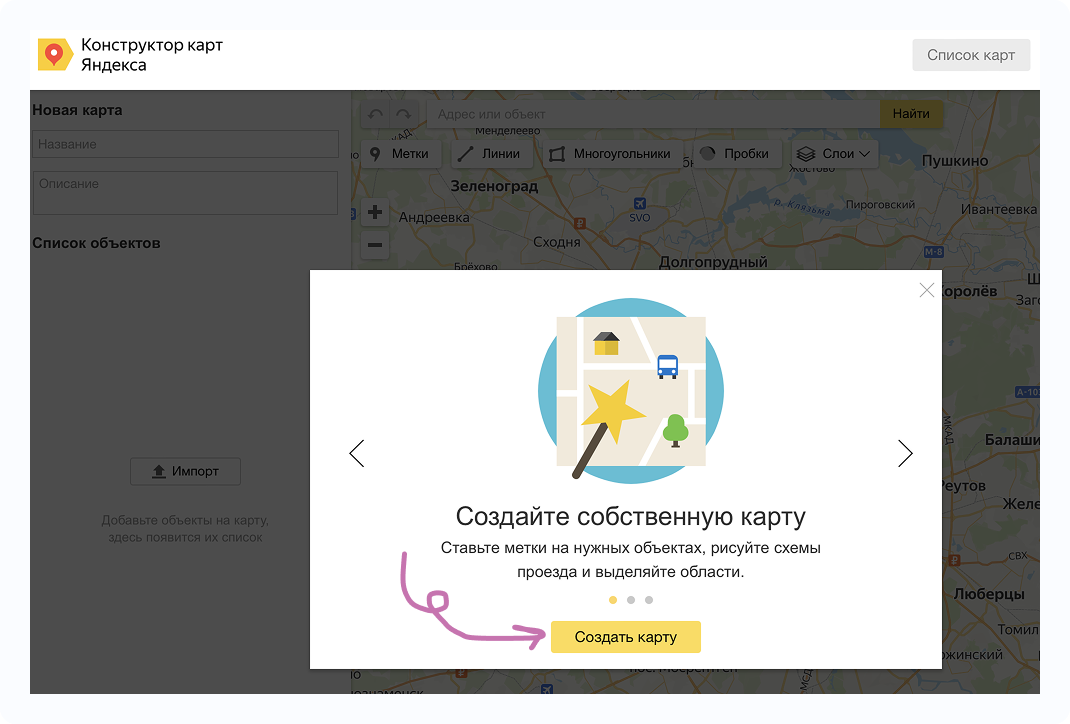
🗺️ How to create a delivery zone map in Yandex Map Constructor🔗
1️⃣ Create a map template in the constructor🔗
1 - Go to
🗺️ Map Constructor
2 - Click «Создать карту» (Create map)
Important ⚠️
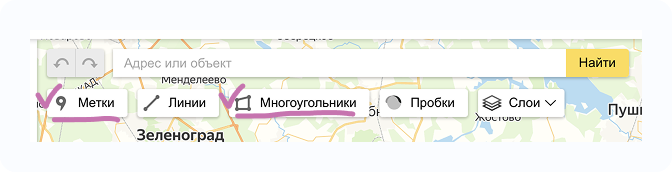
Use only these tools:
- «Метки» (Markers) — to mark the restaurant address
- «Многоугольники» (Polygons) — to draw the delivery zone
2️⃣ Add Markers and Polygons🔗
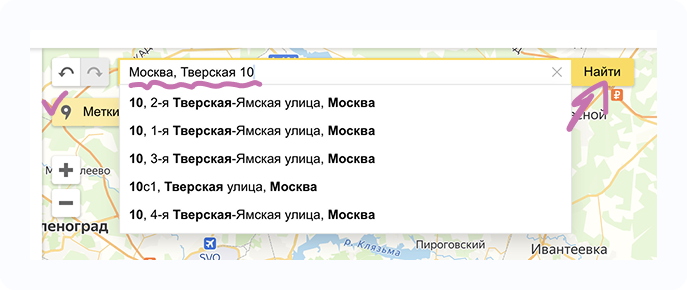
3 - Select «Метки» (Markers)
In the «Адрес» (Address) field, enter your restaurant address
4 - Click «Найти» (Find) → the marker will automatically appear on the map and in the object list on the left
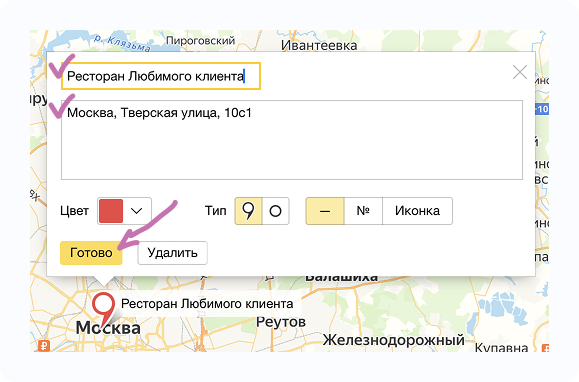
Required 📌
Make sure to specify the restaurant name and address
Click «Готово» (Done)
5 - Select «Многоугольники» (Polygons)
6 - Place points on the map to draw the delivery zone
Use the same color as the marker
Tip 💡
If you placed a point incorrectly, you can move it before finishing editing.
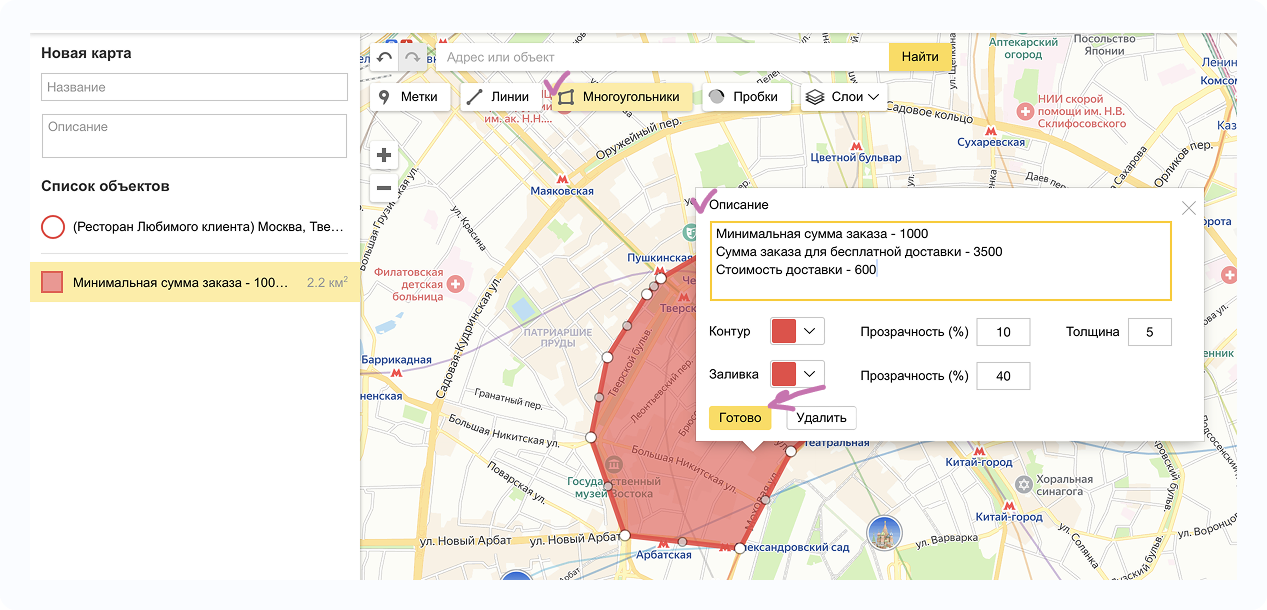
Delivery zone boundaries (polygon borders) MUST NOT intersect ⚠️
7 - In the delivery zone description, you must specify:
- Minimum order amount
- Free delivery threshold
- Delivery cost
8 - Click «Готово» (Done)
The zone will appear in the object list.
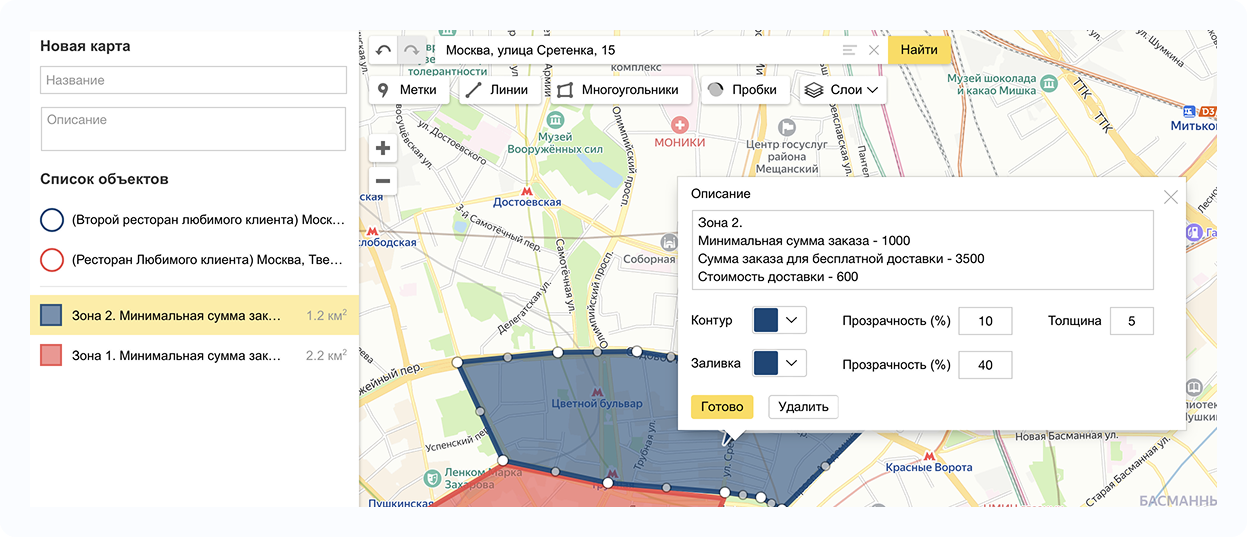
You can add additional zones with different settings ℹ️
For each zone, don’t forget to specify:
- Minimum order amount
- Free delivery threshold
- Delivery cost
If you have only 1 restaurant, proceed to the section 3️⃣ Final steps
If you have multiple restaurants with delivery ℹ️
Repeat the same steps for each restaurant:
9 - Click «Метки» (Markers), enter the address in the «Адрес» (Address) field, click «Найти» (Find)
10 - Specify the restaurant name and address
11 - Change the marker color (to easily distinguish restaurants)
12 - Click «Готово» (Done)
13 - Draw the delivery zone using «Многоугольники» (Polygons)
💡 Use the same color as the corresponding marker
14 - Specify delivery conditions:
- Minimum order amount
- Free delivery threshold
- Delivery cost
15 - Click «Готово» (Done)
For each zone, specify in the description which restaurant serves it ⚠️
3️⃣ Final steps🔗
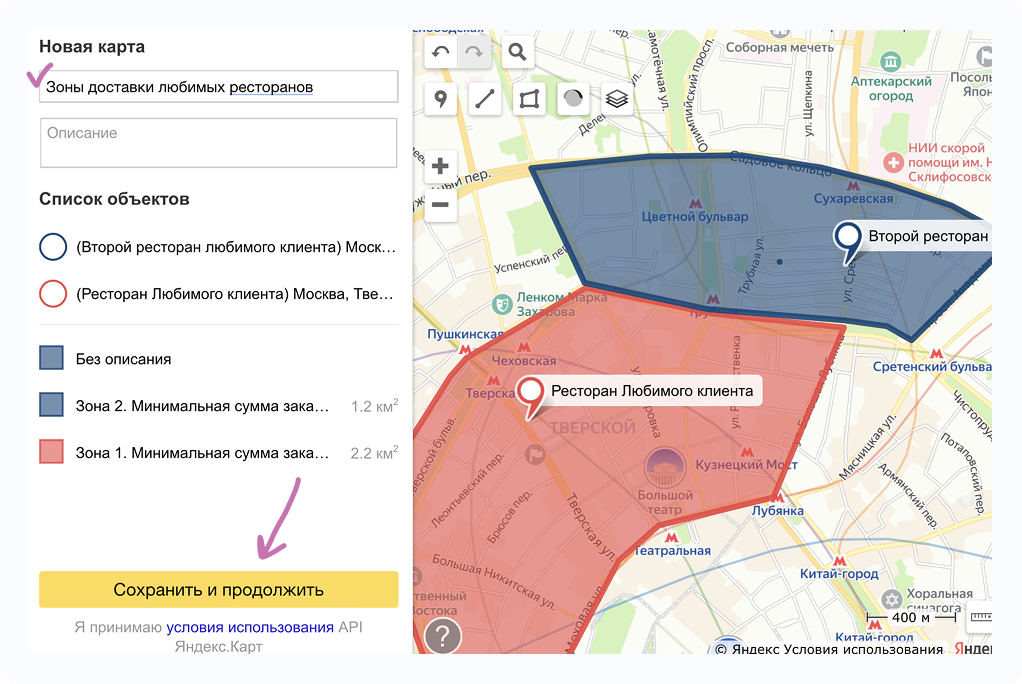
1 - Enter the map name and click «Сохранить и продолжить» (Save and continue)
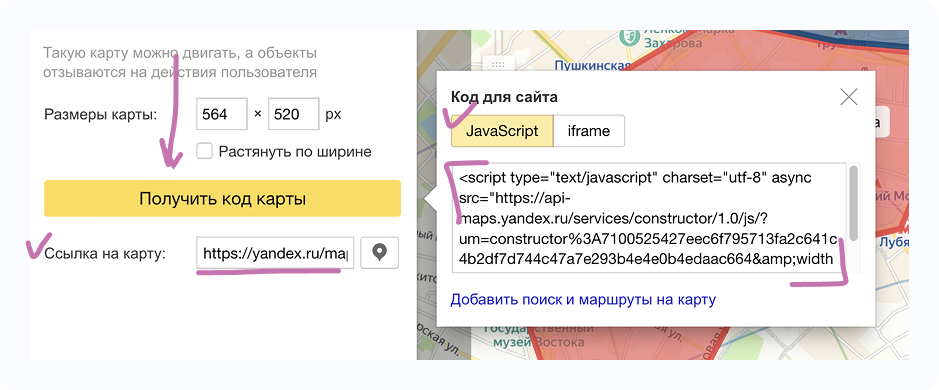
2 - Click «Получить код карты» (Get map code)
3 - Copy:
- Data from the «Ссылка на карту» (Map link) field
- Data from the «JavaScript» field
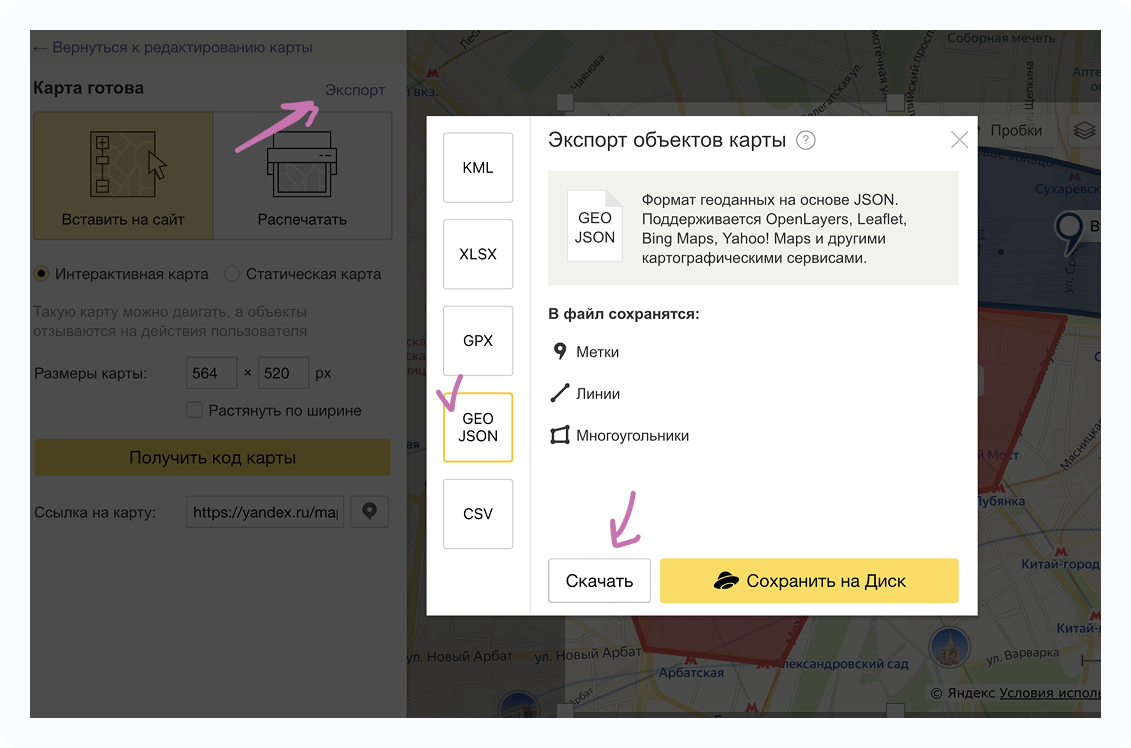
4 - Click «Экспорт» (Export)
5 - In the window that opens, select GEO JSON
6 - Click «Скачать» (Download)
What to send to your manager 📤
Send your manager:
- Map link
- Map JavaScript
- The .geojson file